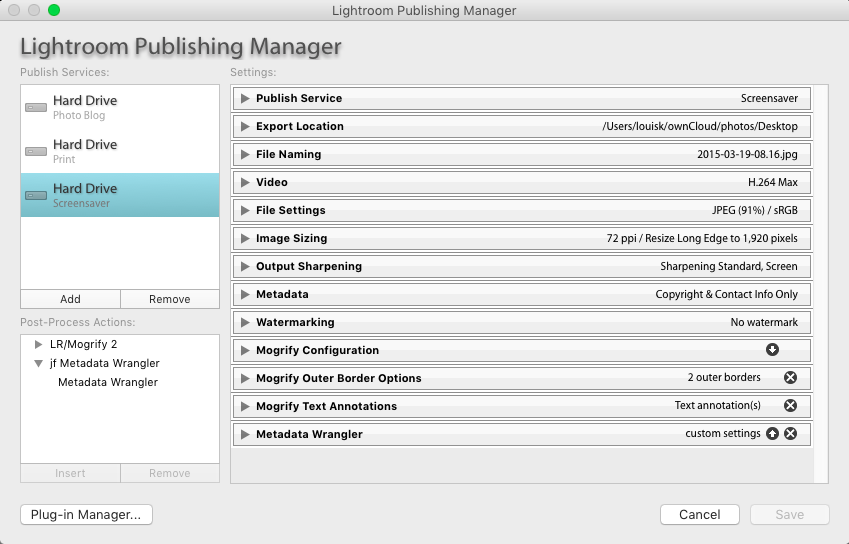
Exporting Overview
This is a quick post with an overview on how I export photos from Adobe Lightroom. I have created a group of specific exports, because I want to keep my settings for each export from getting in the way with any others. I make use of several plugins for these exports including LR/Mogrify2, and jf Metadata Wrangler. LR/Mogrify2 lets you add borders and/or text annotations to photos during an export. jf Metadata Wrangler lets you customize exactly which bits of metadata (such as EXIF tags) show up in the photos you export. Its very customizable.
Publishing manager
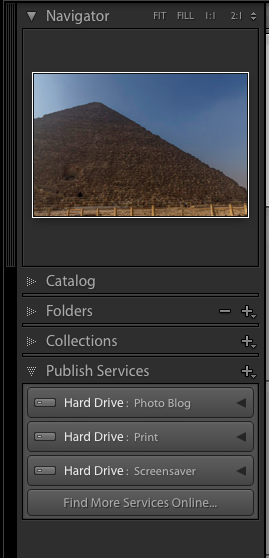
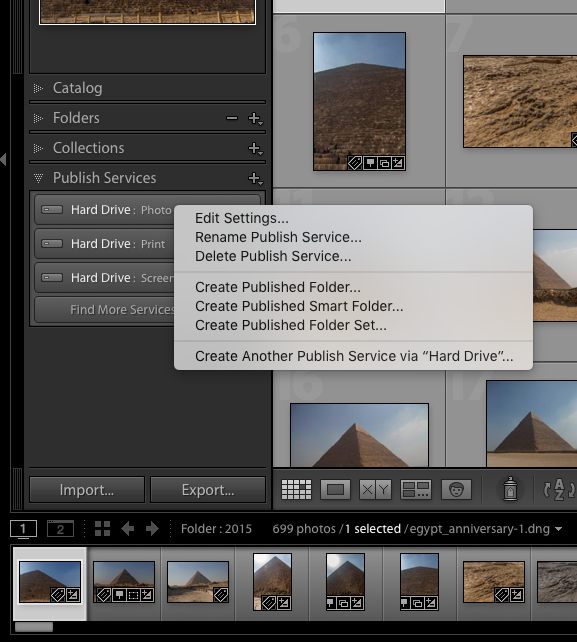
If you already have publishing setup, you will right click and choose edit. If not, click the + there at Publish Services.
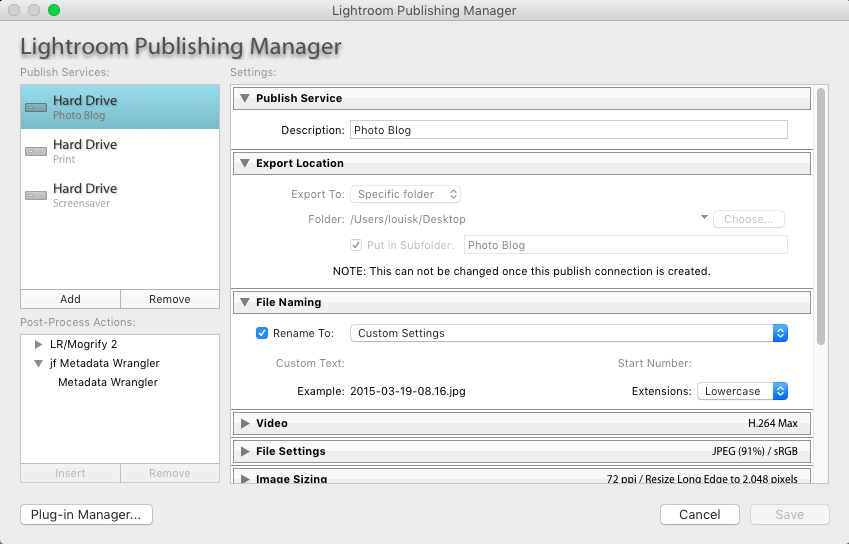
Publish Service name, Export Location, File Naming
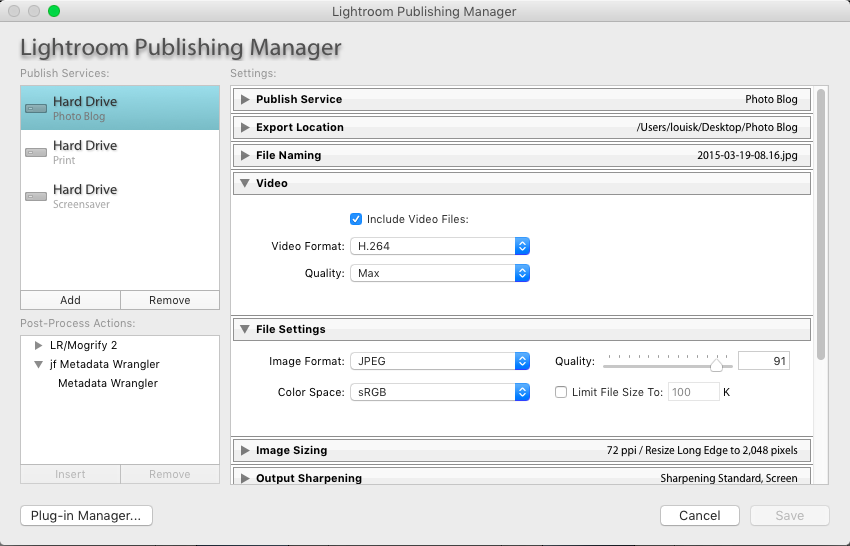
Video, File settings
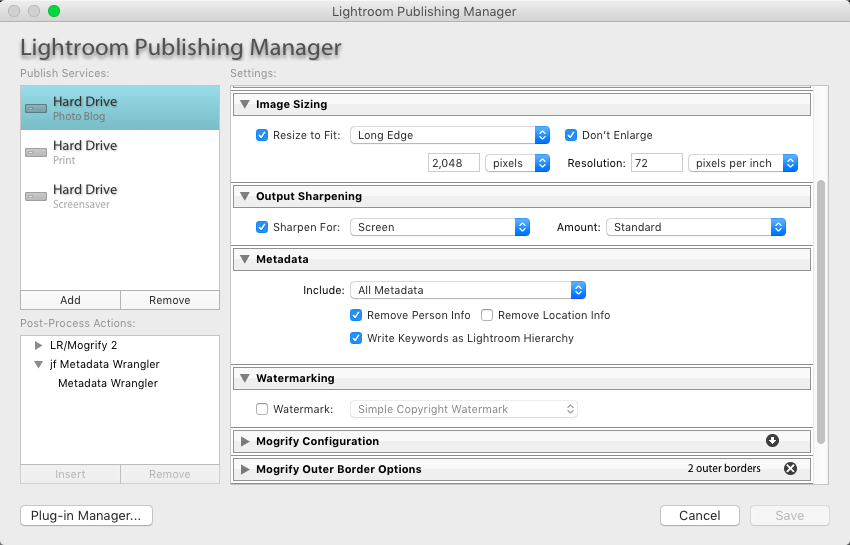
Resolution and DPI
I’m using a higher resolution for this export because I want the images to look good on higher resolution screens, like Apple’s Retina displays (iPhone, iPad, Mac Book, iMac). For most website kind of work, I use a long edge of 1280 and a DPI of 72.
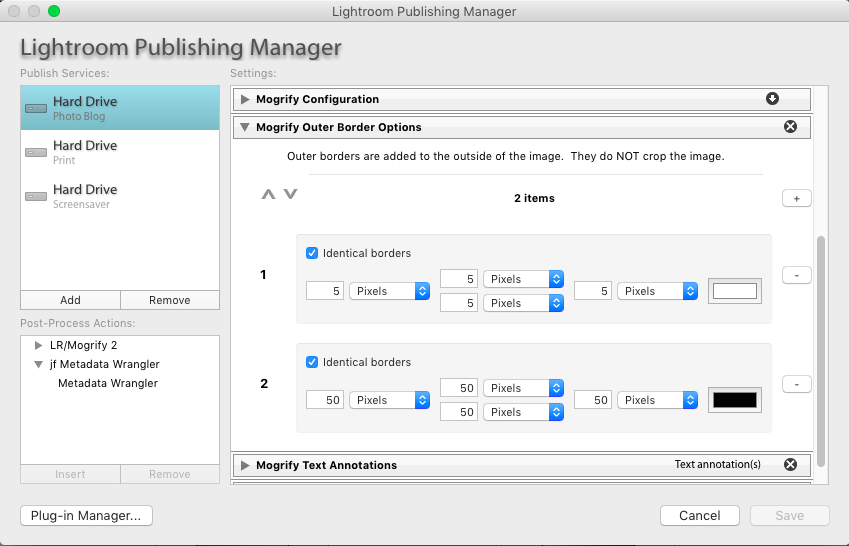
LR/Mogrify2
LR/Mogrify gives me the ability to add a boarder to an image, as well as put text on the boarder, or the image itself. I have it putting the name of the photo, and the copyright information in the boarder (I don’t want to spoil the image with words).
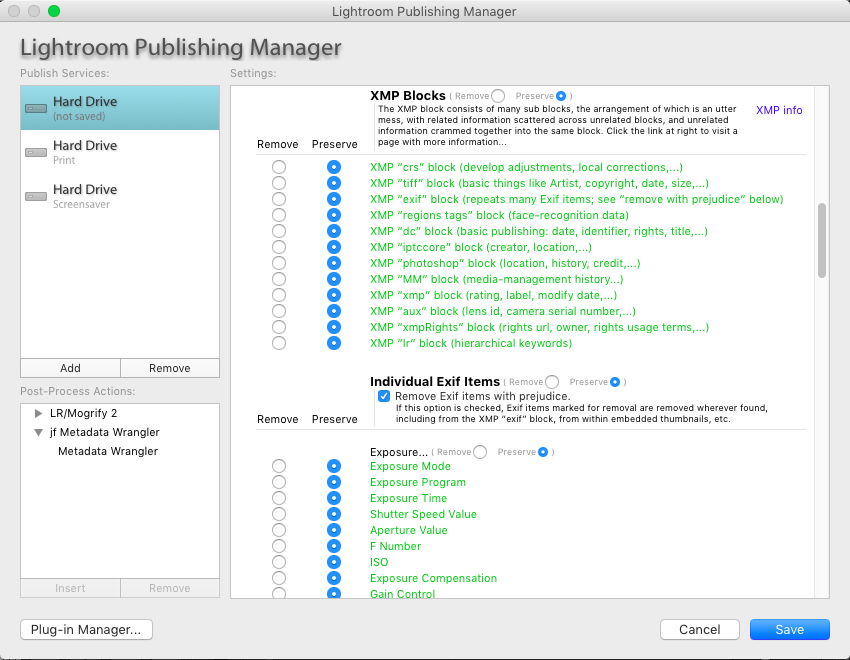
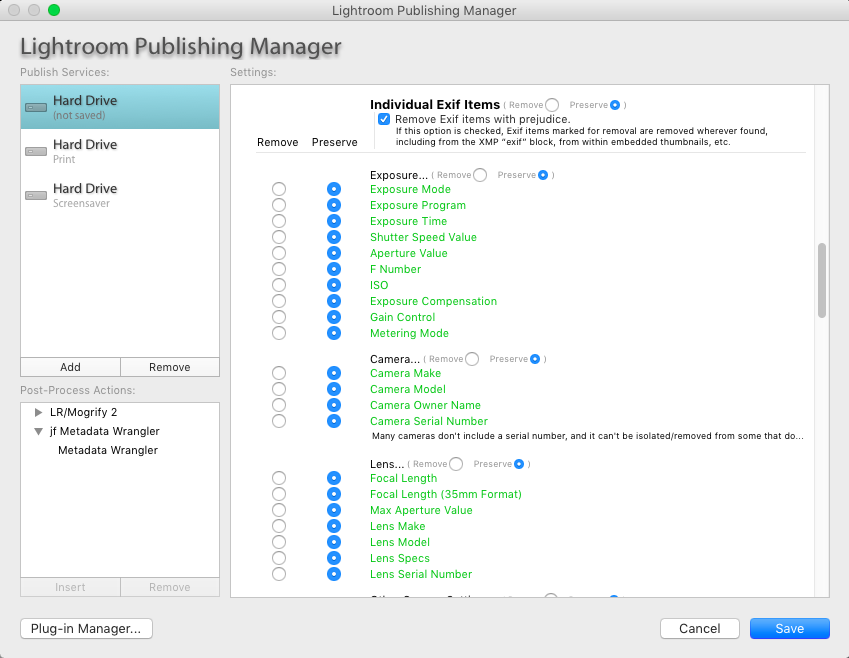
jf Metadata Wrangler
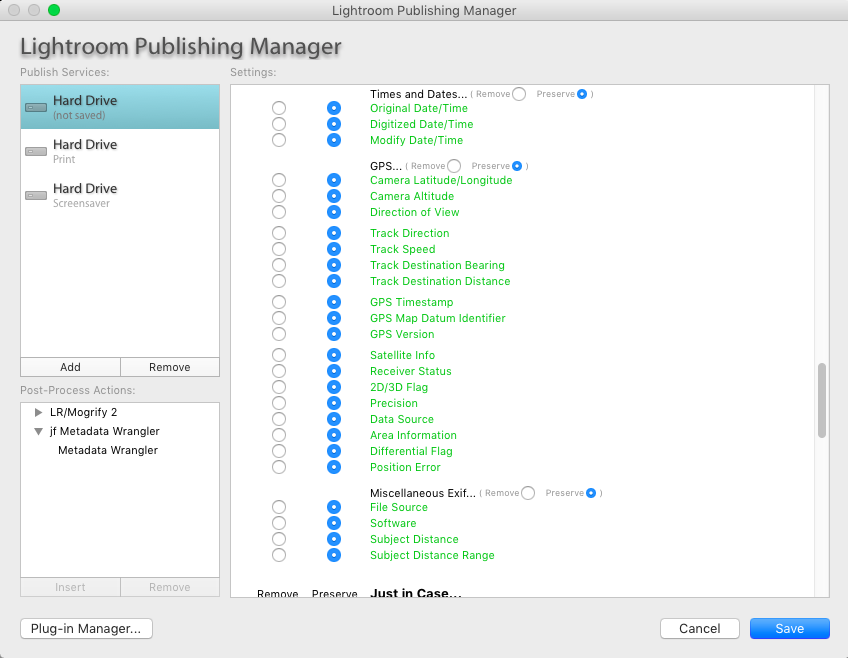
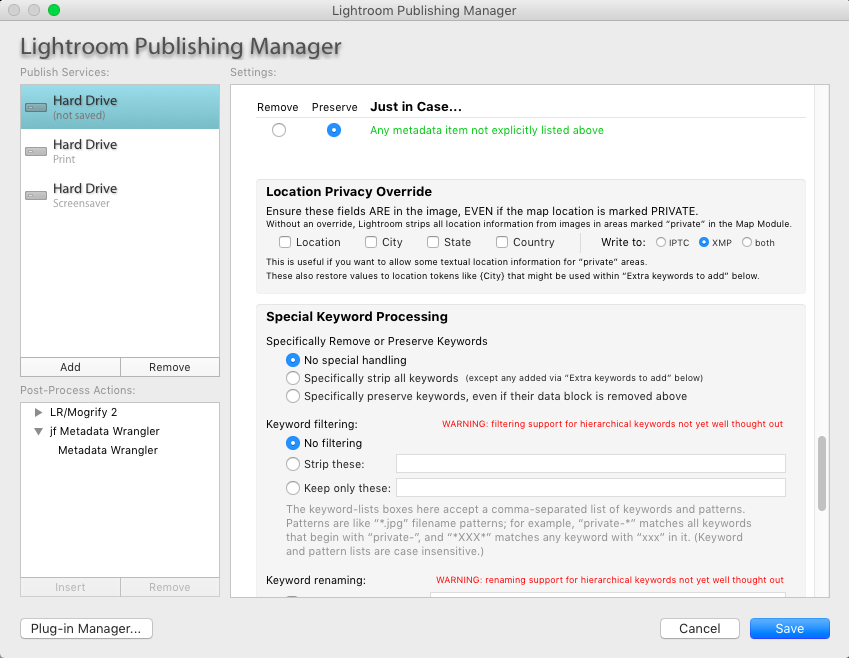
I use the metadata wrangler to help me pick and choose the various bits of metadata I want to stay in the images I post. The majority of the information is not interesting to anybody (things like versions of lightroom, equipment serial numbers, or modification times). I strip out all that. I leave information that might help somebody take a similar photo (type of camera, lens, shutter, aperture, ISO, GPS location). I also keep things like creator, and copyright information in the images that get exported.
Settings overview
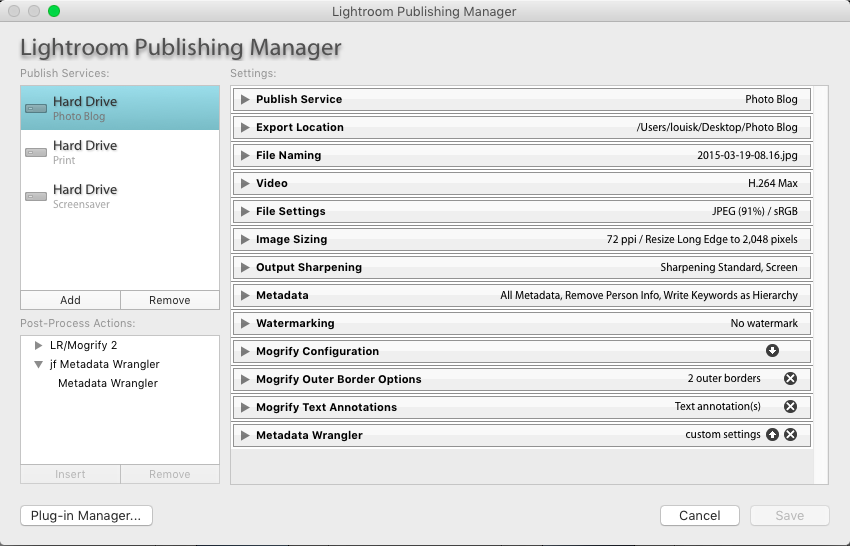
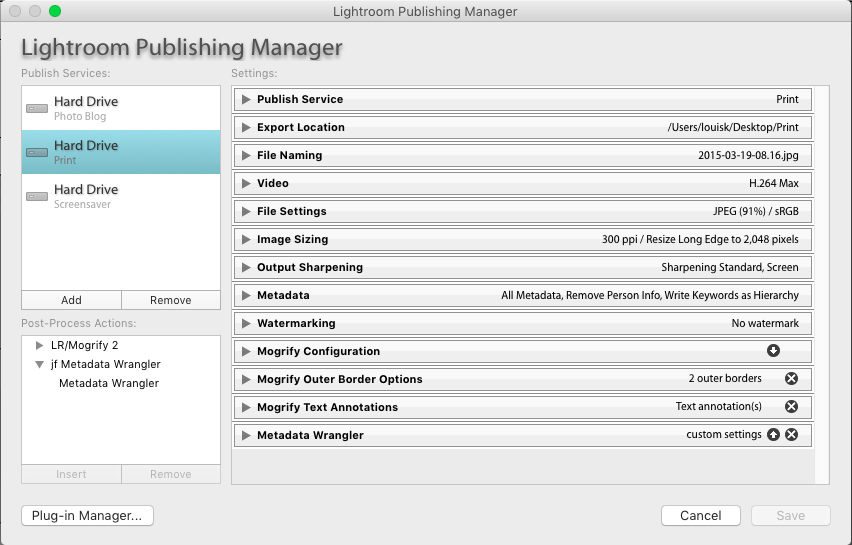
Is it odd to finish with an overview? I’ve covered the settings used for the publish export. Here is the overview of the settings from the other publish services. As you can see, there are only minor differences between them.
Photo Blog settings
Print Settings
Screensaver settings
Summary
Now that we have the publishing services setup, any time we want to publish a photo with those settings, we can simply drag it to the service that matches the settings for how you want to export, right click and choose publish.
Also worth noting, if you change the settings for your publishing service, it will helpfully offer to republish all the photos you’ve published.
