Work flow introduction
I’ve been trying different work flow processes with Adobe Lightroom 6 (it started back with Lightroom 3 and has been extended/refined to version 6/CS) for about a year now and wanted to do a quick write-up on what I’ve settled on (subject to change in the future of course). First, a couple of things:
- I now keep a pristine copy of my RAW files for every shoot, I used to just keep a copy in Lightroom, but there are certain advantages in having an original.
- If I’m shooting outside, I try to take a GPS with me to record where the photos are taken. This information also gets archived with the original files.

Copy RAW and assign GPS
I start by copying the RAW files off the compact flash to my desktop. Then I sync myTracks from my iPhone or iPad with myTracks on the desktop. I select the correct track in myTracks. This shows me the track on a map. Next I drag my RAW files into myTracks. I tell myTracks to track, and then geo-code the RAW files. myTracks can generate XMP sidecar files with the GPS coords (matched by time, so make sure the camera time is set properly), one for each file. The other option is to modify the RAW files directly. YMMV. I’m now done myTracks.
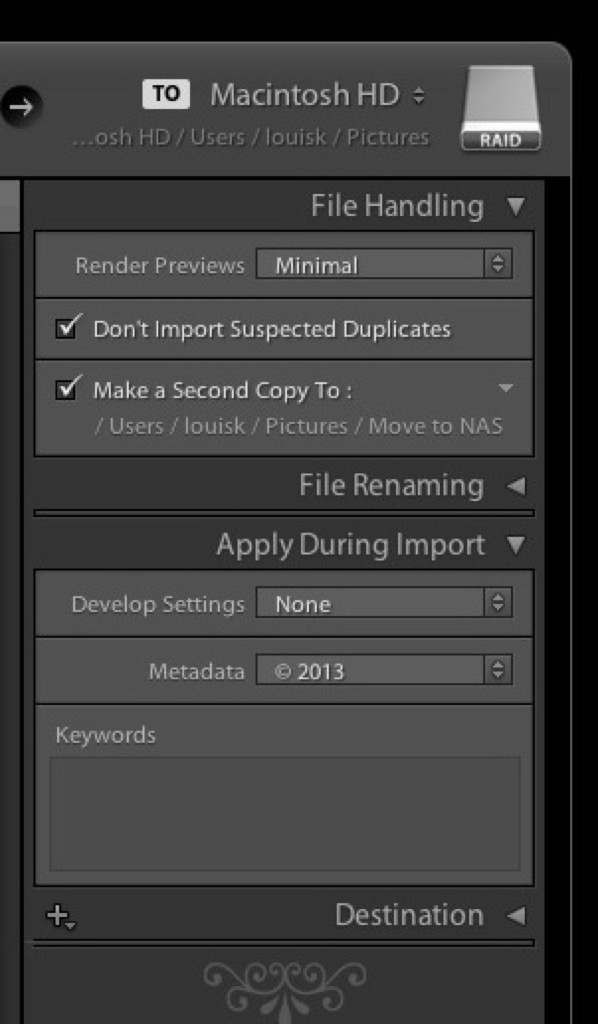
Lightroom import
I open Lightroom and choose the folder containing the RAW files and the XMP sidecar files. When Lightroom performs the import, it also slurps in the XMP file contents and merges it, so it now knows about the GPS coords. Additionally, when Lightroom does the import, I also have it configured to copy the RAW files to a backup directory. I’ve noticed that while Lightroom says nothing about copying the contents of the import folder to the backup folder, the XMP sidecar files also get duplicated to the backup folder. Extra bonus. I can now go through pictures in Lightroom, pick the ones I like, make any adjustments, and export them.
Additionally, there is an application called Hazel which I use to automate the process of moving the RAW and XMP sidecar files off my main computer and onto my NAS. Hazel allows you to define a collection of rules for each folder you want to operate on. Each rule offers quite a number of ways to define what you want to, including color labels, file type, and even scripting. Here are a couple images showing how I’m using it.
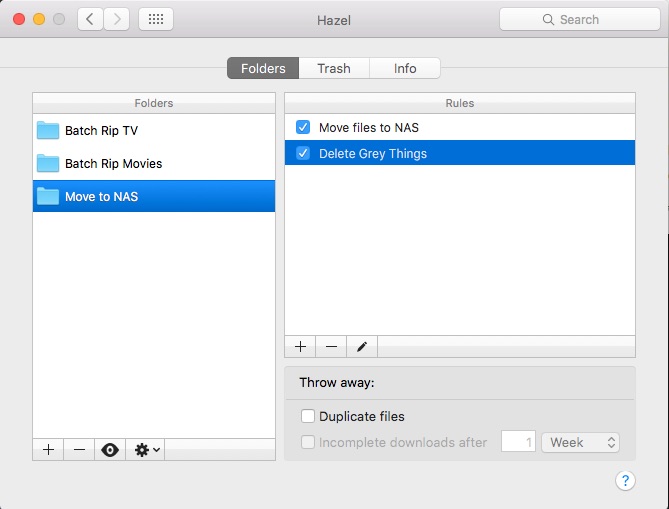
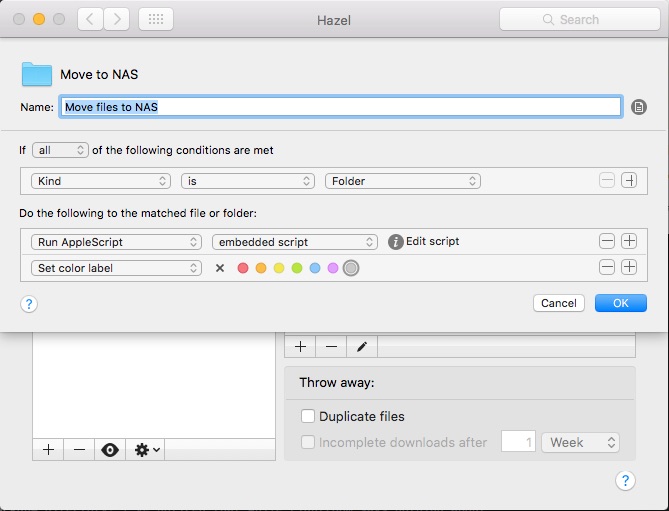
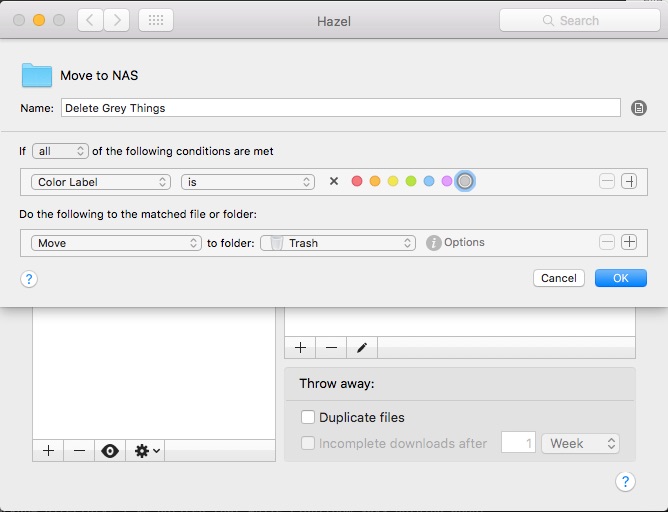
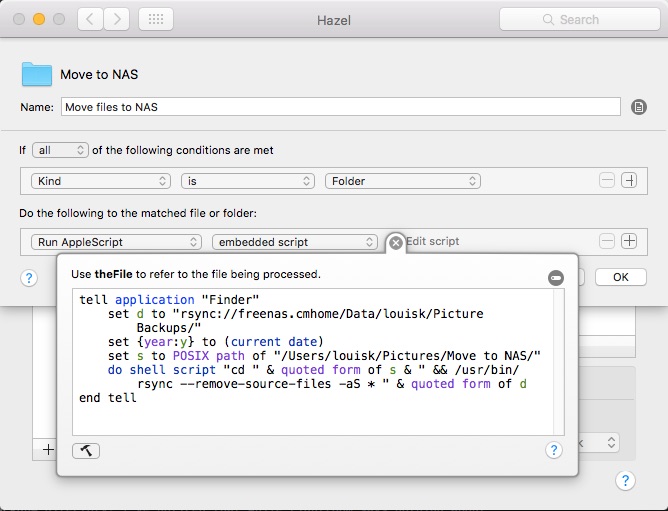
Hazel is using an embedded script that looks something like the following: It is an amalgamation of Applescript and UNIX Shell script. The Applescript acts (in this case) as a wrapper for the shell script. The shell script actually copies the files to my NAS. It also adds a label to the directories it has copied, so another action can go through and remove things that have been copied.
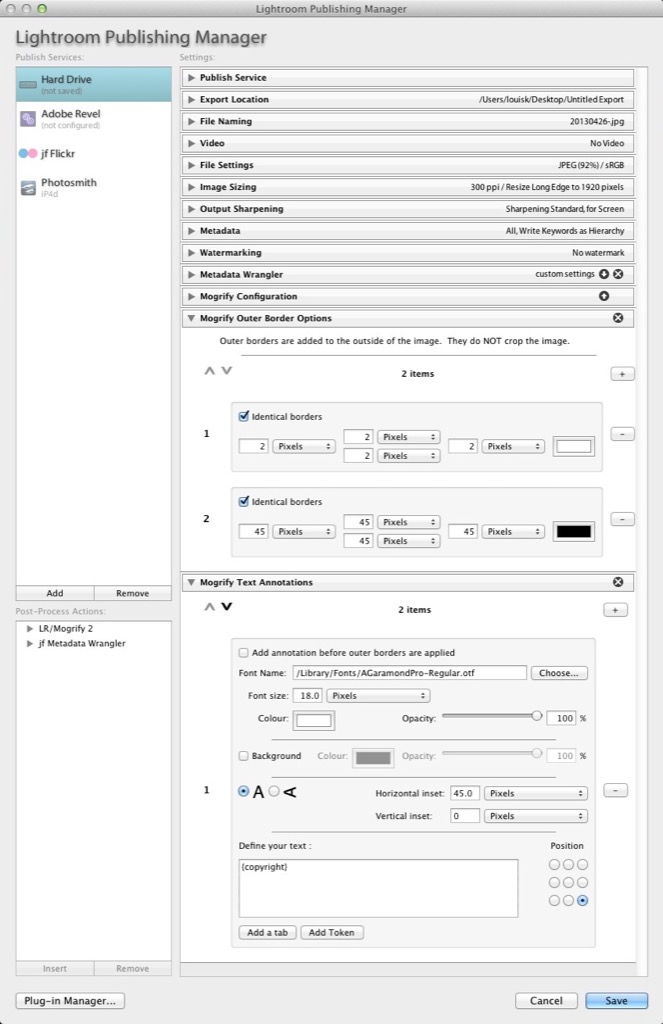
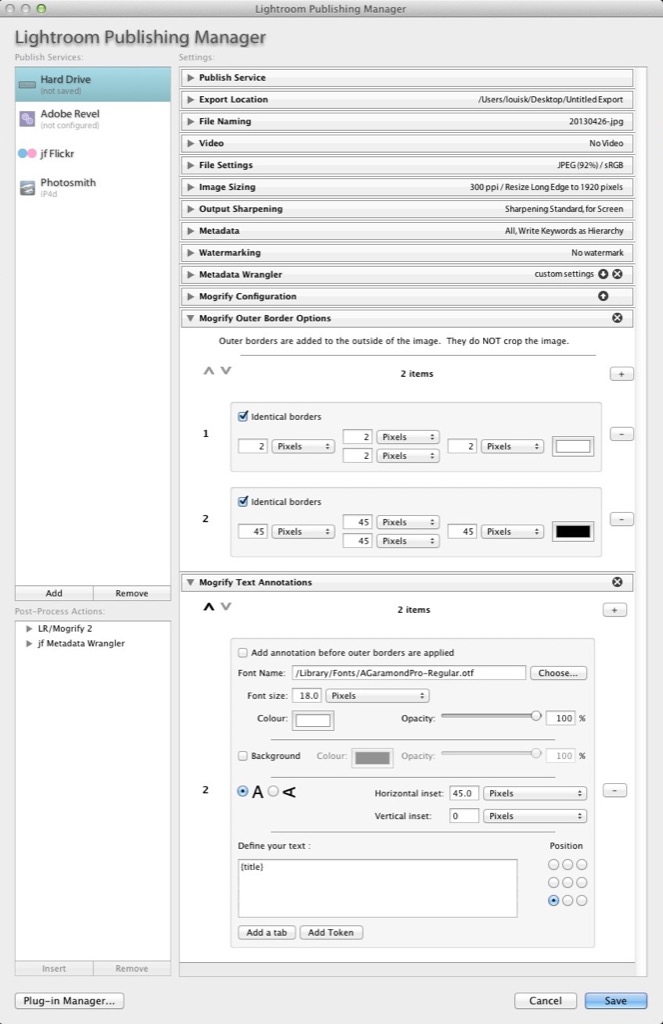
Exporting
This is a bit involved and deserves its own post. That said, here is a quick overview. There are several different ways to export pictures. I have several generic disk exports defined for exporting pictures. These differ mostly in resolution, and pixel density.
- Web - These are sized to be not larger than 1920 on the long edge and 72dpi. Typically they are used for my photoblog.
- Print - These are maximum resolution and 300dpi
- Hi-Res Share - These are sized to be not larger than 4096 on the long edge and 72dpi